Guide to marine electronics

Rick Huckstepp | Volume 23, Issue 1
A revolution in depth sounder developments has resulted in units that can produce an incredible amount of information for the serious angler.
How many pixels do you need? How big is your screen? What are the best range and sensitivity settings? Should you zoom in, zoom out or go for auto? Where is your transducer? How powerful is it? And, most importantly, where are the fish? So many questions, so many options. These days, if you want to catch fish from a boat, your best chance is by using one of the many depth sounders, or ‘fish-finders’ as they are now more commonly called. The science behind these units is developing almost by the hour as they become more sensitive, accurate and incorporate more and more features. Which invariably results in more complexity. In addition, many manufacturers now offer multi-tasking so that your fish-finder can double as your chartplotter/GPS. For the novice boatie, knowing what to look for in a fish-finder is as important as knowing which rig to use and what sort of bait to buy.

We recently had the opportunity to jump aboard Furuno’s new project boat, a Cruise Craft Explorer 625 with enough electronics to equip a small battleship. Apart from a full dash of screens, Cruise Craft pulled out all stops and maximised the bilge space to fit in a brace of transducers.

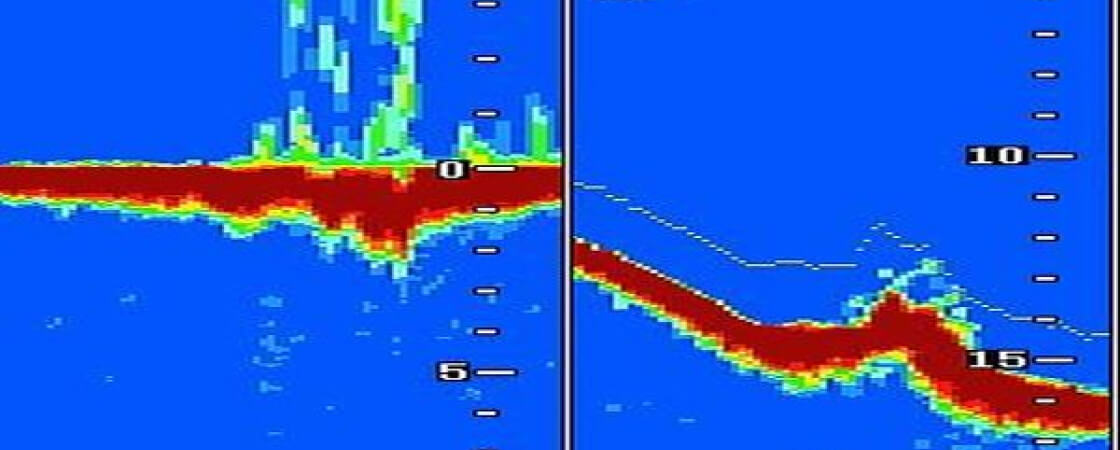
We spent a day out on the water on the new craft and came away mighty impressed with its fish-finding capabilities. We also used the opportunity to sample the equipment in a variety of ways in order to better explain the latest developments in fish-finding electronics, what to look for in a fish-finder and how they can be used for maximum effect.

It should be noted that there is a wide variety of systems on offer from various manufacturers, but many share the same fundamental operating systems, terminology and graphics. The differences are in the number of features offered, size of display, power, and price.

First off, you have to decide exactly what it is you really need in a sounder. For instance, if you’re typically bottom-bouncing in deep water, you might want to look at the top end of the range, as these units will likely offer more accurate identification of fish and deep-water features. But then again, the same units might be just as useful for sorting whiting from weed and reef in shallower situations. You also need to consider the layout of your boat when it comes to the optimum placement for the transducer and screen.

To cover what can be a very complex and confusing subject, we’ve broken our guide down into three parts: advice on what to look for when buying a fish-finder, how to use them once you’re out on the water and a general buyers guide featuring some of the latest systems on offer.

We begin by discussing what features you might want to look for when you’re shopping for your new fish-finding weaponry.

Resolution is the most important feature to consider when buying and one that has a number of aspects:

  • Pixel count: You need to obtain the highest possible pixel count in the vertical format. Horizontal pixel count merely gives a history of what has gone beneath the boat before it falls off the end of the screen and is lost forever. The vertical pixel count, if it is high, offers better resolution. There is no excuse not to have 480 vertical pixels in this day and age for a unit price of around $600.
  • Screen size: Basically, the bigger the better, budget allowing. If you are a bottom-bouncer and spend a lot of time at the transom, get a screen that is big enough to see from where you stand and fish. Small screens are too hard to read at the best of times and near impossible to read at speed over bumpy water.
  • Screen colour: It should be bright and contrast well against the images displayed. The more colours the screen can display, the more detail you’ll see.
  • Backlighting: This should also be bright. The cold cathode-lit screens are far easier to read than bulb-lit screens, which tend to be on the amber side of the colour spectrum.
  • View-ability: The screen should be easily viewed in direct sunlight and while wearing Polaroid or similar quality sunglasses. Make sure the screen can be viewed from the angle that you will use it most. Beware, some units simply ‘black out’ when viewed from side angles.
  • Colour vs monochrome: Colour screens with good resolution are superlative, making viewing easy and will show much more refined information. Having said that, there are a lot of colour screens on the market that are very basic and are not capable of showing images as they should be seen. Don’t get sucked into buying a colour unit just because it’s colour. If it doesn’t offer the resolution that you require after reading the above, abandon it for a quality monochrome unit. A high-resolution monochrome screen will beat a lousy quality colour screen hands-down, without fail.

Fundamentally, you need to do your homework before buying. Ask as many questions as you can, speak to other boaties, check out some of the web fishing forums and, most importantly, set a realistic budget. Like most things, the more you spend, the more you get. But then again, some people aim too high and end up with a high-powered, feature-packed fish-finder, but only need to use a fraction of its capabilities.


Transducers are arguably as important as the screens, because they transmit and receive the signal, which is then sent to the screen/unit for interpretation and display. The power, type and location of the transducer can make all the difference in the world to the accuracy and usefulness of what you see on the screen.

The most common frequencies across the board for transducers are 200 and 50kHz. They are available in stand-alone frequency or, more commonly, in a combination of the two. Generally, 50kHz is used in deep water applications as the lower frequency has greater penetration through water. The downside is that a 50kHz transducer will deliver less on-screen information. In fact, theoretically it will show you only a quarter of the information of the 200kHz unit. Ideally, if you’re looking for bait, small structure and fish down deep, 200kHz should be used until it runs out of power to return a readable signal. You can then take the option to switch over to 50kHz.

Keep in mind that other factors, such as turbulence and water clarity and quality can have an affect on what you see on the screen, how well the signal penetrates the water and to what depth. (When referring to depth, for reference purposes in this article, anything 200m or more is considered ‘deep’.)

Transducer power output is measured in Watts and kilowatts. You will see references in literature to so many Watts “peak-to-peak” and so many Watts “RMS”. If you divide peak-to-peak Wattage by eight, you will arrive at the RMS specification. In a basic unit that might cost $400, you might have 1500 Watts peak-to-peak, while a $1,200 unit might offer 2400 Watts peak-to-peak. But the difference in the capability of the unit can be measured in hundreds of metres. Also, you must remember that, if you are not reading the bottom, the unit will not a have a reference point and therefore will show you nothing between your boat and the sea floor.

Transducers are available in shoot-thru hull, bolt-thru hull and transom-mount configurations. Transom-mount units are by far the most common applications for trailerable boats. Ideally, a transducer should ‘look’ directly down, its beam fanning out in an expanding cone shape. But in practice, some units are positioned/aimed so that their beam is angled slightly, often toward the front of the boat. What this means is that objects/fish that enter the beam on the forward side of the beam may look different on-screen to the same objects/fish that enter at the rear of the beam. In addition, boat movement adds another variable. As the boat rocks fore and aft and side-to-side, the beam is constantly redirected, the movement having its own effect on the screen image.

You also need to appreciate that detected objects first appear on the right side of the screen and gradually scroll off to the left. Therefore, if you’re sounding or trolling for fish, you need to keep your eye on the screen and try and react quickly if you see something, it may be gone by the time you place your lures or bait. Generally, when you have the ‘Fish ID’ function turned off, fish will often appear as arches or parts of arches or perhaps ‘blobs’ with rounded tops.

Every different brand of depth sounder deciphers images and displays them differently. If you are using a unit that is capable of showing arches, the closer the target is to the middle of the beam, the more arched they’ll appear, flattening out as they cross further from the centre. And even a big fish might only show as a small shape on the screen if it happens to be at the outer edge of the beam. Ultimately, it is only by experience, in a variety of conditions and using different screen settings, that you will become familiar with what your screen is really telling you and be able to accurately identify what’s down below.

The analogue frequency output of the transducer is converted into sound pulses, which are transmitted through the face of the transducer and travel through the water column in the form of a radiating conical beam, as mentioned previously. The time the signal takes to travel to an object and return determines measured depth, while the system also uses the return strength and volume of the signal to determine shapes and relative sizes.

Transmission of the signal takes place many, many times per second and in more modern units it is variable automatically and manually. When moving at speed, as opposed to idling or trolling speed, manually increased ‘ping speed’ will send more signals down hopefully returning more information. Often, this increases the scroll rate of the screen, which allows more information to be displayed.

The amount of information received by the unit has a direct bearing on how much detail is displayed on the screen. It should be noted that there are units in the marketplace that may transmit at high frequency, but lack the full capacity to decipher the information and convert it into an image that you can use to make sound fishing decisions.

Your transducer should be mounted in a position where clean, turbulence-free water passes under its face. Turbulence will break the transmission of signals to the screen and result in gaps in the display. Too much turbulence and the screen will go blank. This can happen when the boat is underway if the position of the transducer is not ideal.

When installing the transducer, ensure that it is not directly behind a trailer skid or roller, or behind a strake or a half strake that ceases midway along the hull. Strakes can create turbulence that disturbs the clean flow of water and disrupts the reading on-screen. Most transom-mount transducers have an impact-activated release, which allows the transducer to kick up if it collides with an object. If set too loosely, though, it may be tripped by heavy weed.

Transducer positioning is critical to accurate readings, so if in doubt, speak to the experts. Getting the position just right on individual hulls can sometimes be a matter of trial and error as what works on one boat may be useless on another. This is particularly so when a boat is underway. Most units should continue to give accurate readings while the boat is moving, but some can struggle at higher speeds.

For the average user, sensitivity or ‘gain’ is the most under-utilised of functions on a fish-finder menu, the which means that many anglers fail to get optimum performance from their sounder.

Most fish-finders have a sensitivity scale from 0 to 100 per cent, but in reality the unit is not working at near optimum level until sensitivity is above 50 per cent.

Increasing sensitivity is akin to increasing the volume of a hearing aid. It allows the unit to ‘hear’ signals that are weaker, whether from small fish and objects near the surface or from big fish deep down in the water column. It also applies to fish in shallow water, but which are on the edge of the beam.

Every unit/transducer/boat combination tends to have its own optimum operating settings, which may also be affected by the type of fishing you do and where you fish most. The best bet when it comes to sensitivity is to practise as much as possible with your combination, ideally in areas where you are already familiar with the terrain and type of fish likely to be there. The more ‘field experience’ you have, the better you’ll be able to utilise your sounder.

To help speed up the process, here are a few pointers:

In water under 20m in depth and pushing the sensitivity to 100 per cent, the screen may well fill with clutter from top to bottom, depending on the power of the unit. Ease the sensitivity level back incrementally until the clutter starts to disappear from near the bottom. The more you reduce the sensitivity, the more clutter should disappear from the bottom, spreading upwards as it is decreased. Once the screen is cleared for the level of the water column that you wish to investigate, the unit is at its optimum setting for that depth. The smallest of objects, such as single baitfish moving into the transducer beam, should now be readily detected and shown clearly on your screen.

The same process should be applied to different depths of water, until you become familiar with the optimum settings for various depths. As you experiment, remember, the further a signal has to travel, the weaker it is by the time it gets back to the transducer.

Most of the time you will be left with heavy clutter across the top of the screen extending down into the viewing area of your screen. If you’re bottom-fishing, it’s best to put up with this, although you may be able to clear it using a surface clarity control in the menu. Using the upper and lower limit function can also help, if you have that facility.

If searching for pelagic fish very close to the surface, a reduced sensitivity/gain level will clear the screen near the top, but remember that by reducing that sensitivity, the unit will be less effective at greater depths. In other words, by narrowing the sensitivity, you might be missing out on the action just a little further down.

Then again… In deep water, 100 per cent sensitivity can be the ideal, as long as the clutter isn’t too dense near the bottom. If searching for fish and structure at depth, maintain the highest possible sensitivity to get the very best out of your unit.

Many fish-finders, including some basic models, have a function called ‘Grey Line’ or ‘White Line’. While Grey Line refers to that function in a mono unit, a colour set utilises ‘Colour Line’. However, they serve the same purpose, and that is to give the viewer a more refined definition of objects and fish close to or right on the bottom. White Line usually relates to monochrome units and is similar to grey line.

A correctly set Grey, White or Colour Line is crucial for those targeting bottom fish. In this scenario, the image of the actual bottom is reduced to a fine black line and a grey, white or coloured band is produced immediately below it. If the black bottom trace changes thickness, this is an indicator that the bottom texture has also changed. This change could be brought about by weed growing on the bottom or fish swimming close to or hugging it. A hard bottom will display as a thicker grey, white, or colour line below the initial bottom drawing. Without the grey, white or colour band under the black bottom line, this change in bottom hardness would not be noticed; rather it would be a black, indecipherable mass. It is this ability to read the thin initial bottom trace and grey, white or colour line that serves the bottom fisher well, especially those who target species such as whiting, snapper and flathead, which spend the majority of their time swimming on or near the bottom.

Objects above the bottom having a dense mass may also ‘grey or white line’ or ‘colour line’. Tight bait balls under attack from predators may appear with a grey or colour line centre, whilst the outer edges of the bait ball will be made up of more sparse and weaker signal returns. A large single fish might also have a grey/colour line section at its centre. A matt of floating weed, on the other hand, will usually not display a solid mass and will have the same texture throughout – which can sometimes be confusing, because a loose ball of bait will show up on the display looking similar to the weed. One way to differentiate between the two is to investigate with a bait jig.

It must be remembered that signal returns coming back to the transducer vary in strength as the depth and density of water changes. Turbulent, muddy water may require an increase in the grey or colour line setting of your unit. Sensitivity settings in this situation may also require a slight increase. As you move over deeper water, your sensitivity and your Grey/Colour Line settings may have to be increased also.

Fundamentally, the sensitivity setting in the unit will have a direct bearing on the view and grey line readings on the screen. We are, after all, looking for particular habitat, be it soft sand, hard rock or weed beds, depending on the species of fish targeted.

This explanation is put forward to maximise your results in manual mode. Many fish-finders have auto functions that are very good, but might need to be switched off if you are going to push your unit to its limits.

The bottom lock function allows the undulating bottom to be displayed on the screen as flat, while fish above it are shown clearly. Hard and raised structure on the bottom will be displayed in reverse, below the bottom drawing. This function is a favourite in Western Australia for boaters fishing in big swells, as it takes the rise and fall of the boat out of the equation, which can increase depth by many metres in some cases.

The Upper and Lower Limits function is one that some sounders have on their menu keyboard. On brands other than Lowrance, it may be referred to under another name such as ‘Shift’. Generally, it is used less frequently than it should be because the ‘Zoom’ feature is usually easier to access, its activation buttons being on the face of the sounder. You need to consider that, in many cases, the Zoom feature does not give a true representation of the bottom and other objects detected by the sonar beam. As the Zoom is magnified, what we are actually looking at on the screen is compressed in from the sides and elongated upwards. In other words, it is distorted. This, in effect, can turn a mediocre bottom structure, such as a flat, rounded bommie, into a sharp pinnacle that might lead some to conclude that rich pickings lie below.

The upper and lower limits or Shift feature, on the other hand, will allow us to take a horizontal slice out of the water column and expand it, in proportion, over the full screen. This, in effect, gives us a clearer picture by having a concentrated section of water shown with more pixels on a full screen. Objects and fish that could not be seen previously due to their weak signal return are more visible when this function is used. This is also a handy function for reading and looking into thermoclines, which are a change of density in the water which comes about usually due to slight variations in the temperature of layers of the water column. Often seen in freshwater systems, bait fish use these temperature barriers as habitat to shield from predators. They may live in, above or below the thermocline, depending on the comfort level the thermocline offers.

While $400 might get you into a bottom-end fish-finder that will give you depth and a reasonable display for basic use, most trailer boaters need to look at a unit capable of a vast range of uses. If contemplating colour, the cost will need to be in the vicinity of $1,000, or more. If working in deeper waters, such as those in the vicinity of the Continental Shelf, where depths are regularly 300-plus metres, you really have to contemplate a 1kW transducer for around $1,400 and the unit capable of driving it will be around $2,000 or more. This is a rough guide for a stand-alone fish-finder, opting for a combination fish-finder/GPS will ring the till to around $1,000 more.

There are some great innovations happening in the marine industry and none of the electronic companies are resting on their laurels.

In 2008, Navico is introducing a Network Sounder system for Lowrance units, which it claims will allow low-powered transducers (below one kilowatt) to be used in very deep water. An outlay of around $999 will be much more palatable than the $1,400 currently needed for a one kilowatt transducer – let alone the increased cost of the unit needed to drive such a transducer.

Simrad now uses 1kW transducers with ceramic elements on some models, which it claims can be used in waters up to 1800 metres deep.

Furuno has a wide range of transducers up to 3kW and has recently catered to the small trailer boat angler with the introduction of the FCV-585 and 620 models. And, no doubt, 2008 will see a host of new models from many of the marine electronics manufacturers.

But the basics remain largely unchanged. If you’re serious about your fishing, you need to keep abreast of developments in fishing electronics and, more importantly, you need to know what your fish-finder is telling you and how to optimise its effectiveness. Getting to know your fish-finder will result in more productive time on the water and less cost and time spent chasing fish.


Fishing and boating journalist, Rick Huckstepp has been providing information and instructions on how to operate depth sounders to new and experienced users for the past decade. He has been involved in the fishing and boating industry for 25 years, working extensively around Australia and throughout the South Pacific.

For a number of years, he has travelled the national boat and tackle show circuit conducting workshops and stage presentations on subjects such as marine electronics, fishing and boating techniques.

His book, Depth Sounder Secrets, was born as a direct result of the many audience questions that have arisen over that period. It contains a wealth of information on all aspects of depth sounder usage, including installation tips, useful features and reading screens.
Give us a call on 1300 00 CLUB (2582)
Any discounts offered are applied to our standard rates. Promotional or other discounts may apply from time to time. Minimum premiums may apply. Any discounts/entitlements only apply to the extent any minimum premium is not reached. If you are eligible for more than one, we also apply each of them in a predetermined order to the premium (excluding taxes and government charges) as reduced by any prior applied discounts/entitlements.

Any advice here does not take into account your individual objectives, financial situation or needs. Terms, conditions, limits and exclusions apply. Before making a decision about this insurance, consider the Product Disclosure Statement (PDS)/Policy Wording and Supplementary PDS (if applicable). Where applicable, the PDS/Policy Wording, Supplementary PDS and Target Market Determination (TMD) for this insurance are available on this website. We do not provide any form of advice if you call us to enquire about or purchase a product.

Club Marine Limited (ABN 12 007 588 347), AFSL 236916 (Club Marine) issues this insurance and handles and settles claims as agent for the insurer Allianz Australia Insurance Limited (ABN 15 000 122 850) AFSL 234708 (Allianz). Club Marine is a related body corporate of Allianz. Copyright © 2024 Allianz Australia Limited