
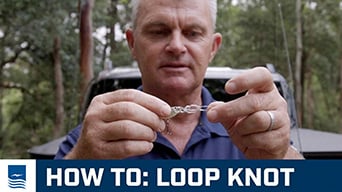
Learn how to tie the ultimate Paternoster rig (also known as a dropper rig) with Al McGlashan. This versatile and easy-to-tie fishing knot is a must-know for any angler, perfect for targeting everything from bread-and-butter species like Flathead, Whiting, and Snapper to larger game like Gummy Sharks.
How to tie paternoster rig with Al McGlashan

Good day. I'm Al McGlashan, and welcome to Club Marine TV.
Today I'm going to show you a knot that is easy to tie and perfect for just about every fishing situation.
The paternoster rig is really simple and works well for a wide range of species. The first thing I do is lay everything out so I know where it's going to fit. We're using pink twine here because it's easier to see.
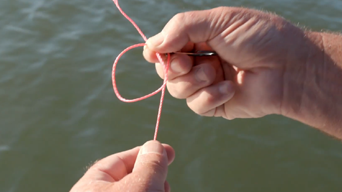
To start, make a loop in the main line. The size of this loop will determine the size of your dropper. Wrap it against the main line and then twist the two lines over each other four or five times. With the gap in the middle, feed the end of the loop through and pull it tight. If you're using monofilament line, make sure to lubricate the knot first because friction can damage the line. Pull it tight and you'll have a perfect dropper loop.
When fishing with lighter tackle for species such as whiting, pinkie snapper or flathead, simply feed the loop through the eye of the hook and loop it back over the hook. The dropper is now in place. The advantage of this method is that you can change hooks very easily.
Below the dropper, you'll need to add the sinker. The distance between the dropper and the sinker will depend on the species you're targeting. For flathead, you generally want the sinker fairly close so the bait doesn't sit too high. If you're fishing for snapper around reefs or rough country where snagging is common, leave a longer length between the sinker and the first dropper.
To add the sinker, tie a simple double overhand knot, or what I call a double granny knot. Pass the loop through twice and pull it tight. Just like the hook, you can attach the sinker by passing it through the loop and then back over itself. This makes it very easy to swap sinkers if you move into deeper water and need more weight.
One tip worth mentioning is that if you're fishing in very snaggy country, it's a good idea to attach the sinker using a lighter piece of line. That way, if you get snagged, you'll only lose the sinker rather than the entire rig.
At the other end of the rig, I like to use a swivel because it helps reduce line twist and makes it easy to connect to your main line. To tie it on, make a loop in the line, place it against the main line, wrap the tag end around a few times and pull it tight.
The number of droppers you use depends on what you're targeting and the regulations in your area. Most of the time I prefer to use two droppers. They're great for flathead, snapper, bream and whiting. Keep them far enough apart so they don't tangle, with the sinker hanging below them.
If you're targeting larger fish such as emperor or gummy sharks, a single dropper is usually the better option. But if you're chasing table fish like whiting and flathead, two droppers are ideal because you can catch two fish at once and fill the esky a bit quicker.
And that is why the paternoster is such an easy and effective rig for catching just about anything.
Now let's tie the same rig using monofilament line. We're using 50lb mono. Make a loop in the line and position the two sections together. Twist them around each other several times, then pass the loop through the gap in the centre. Pull it down, lubricate the knot and tighten it. That's your first dropper.
For the second dropper, place it far enough away so the hooks won't interfere with each other. Make another loop, twist the lines together five or six times, pass the loop through the opening in the twists, lubricate it and pull it tight.
Now you have two droppers spaced correctly apart. Next, tie the sinker loop with a double granny knot, passing the loop through twice before tightening it. A little lubrication won't hurt here either. Attach the sinker, knowing you can easily swap it out to suit changing conditions.
At the other end, tie on a swivel using a basic uni knot. Pass the tag end around the main line and through the loop three times, lubricate the knot and tighten it.
The final step is to attach the hooks. For light tackle fishing, simply pass the hook through the dropper loop and then loop it back over the hook. Repeat for the second hook.
And there you have it. The rig is ready to fish. Remember, if you're fishing around snags, use a lighter connection for the sinker so you only lose the sinker if it becomes stuck, rather than the entire rig.
Now it's time to go fishing and hopefully catch something for dinner. Perfect way to start the day.
RELATED VIDEOS


Any advice here does not take into account your individual objectives, financial situation or needs. Terms, conditions, limits and exclusions apply. Before making a decision about Club Marine boat insurance, consider the Product Disclosure Statement (PDS)/Policy Document and Supplementary PDS (if applicable). Where applicable, the PDS/Policy Document, Supplementary PDS and Target Market Determination (TMD) for Club Marine boat insurance are available on this website. We do not provide any form of advice if you call us to enquire about or purchase a product.
Club Marine Limited (ABN 12 007 588 347), AFSL 236916 issues Club Marine boat insurance and handles and settles claims as agent for the insurer Allianz Australia Insurance Limited (ABN 15 000 122 850) AFSL 234708 (Allianz). Club Marine Limited is a related body corporate of Allianz. Copyright © 2026 Allianz Australia Limited.